
실습 사례 - 사용자 정의 마우스 클릭 효과
이전 문서: 실습 사례 - 사용자 정의 마우스 클릭 효과 게시일: 2023-8-14 마지막 수정: 2024-9-12 원래 분류: ⌨ 개발 튜토리얼 요약: 마우스 클릭 효과를 구현하는 개발 예시입니다.
💡 이 문서는 개발 예시입니다. NotionNext에서 사용자 정의 기능을 빠르게 삽입하는 방법, 예를 들어 사용자 정의 마우스 클릭 효과를 추가하는 방법을 배울 수 있습니다.
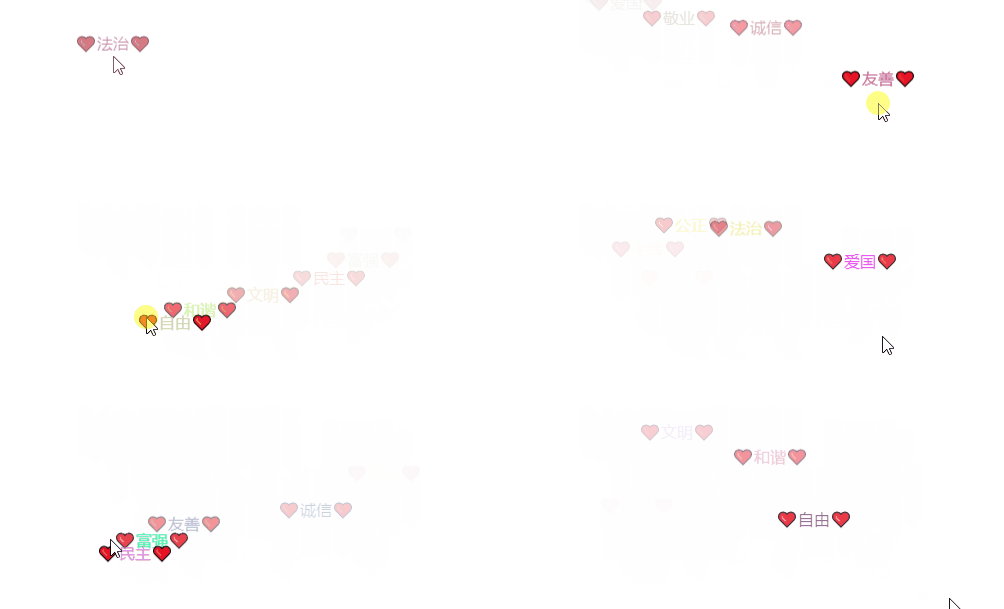
이 튜토리얼을 따라 하면 웹페이지에서 마우스를 클릭할 때 포인터 클릭 위치에 가치 키워드가 떠오릅니다.
작업 단계
프로젝트의 /public/js/custom.js와 /public/css/custom.css 두 파일을 각각 수정하면 이 클릭 효과를 구현할 수 있습니다.
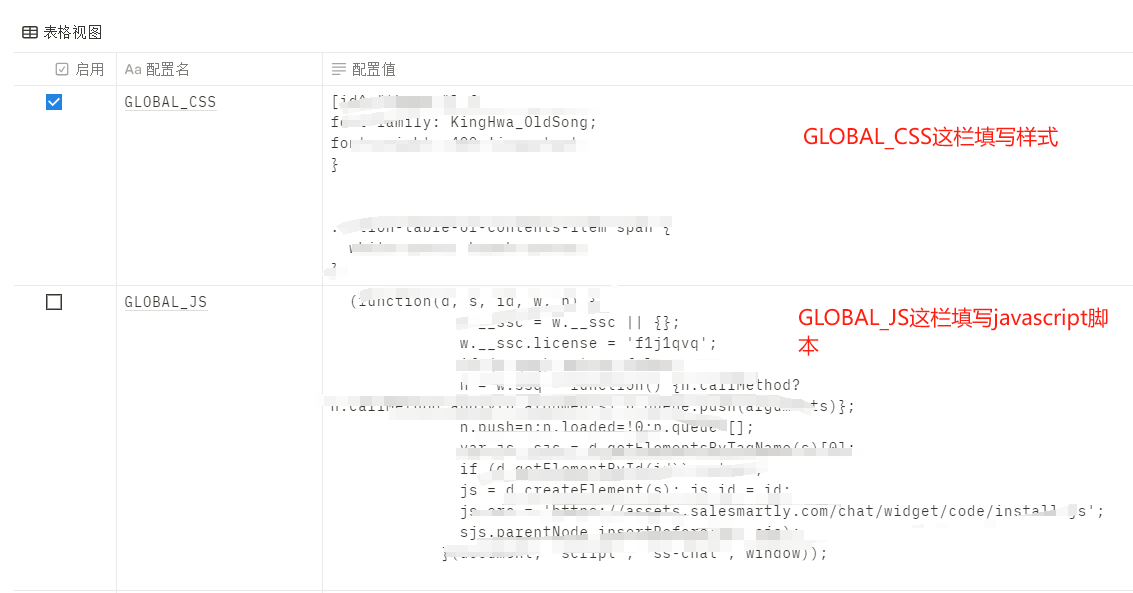
물론 소스 코드를 직접 수정하지 않고 Notion 설정 센터에 추가할 수도 있습니다. 설정 센터의 GLOBAL_JS는 소스 코드의 /public/js/custom.js에 대응하고, GLOBAL_CSS는 코드의 /public/css/custom_css에 대응합니다.
1. 스크립트
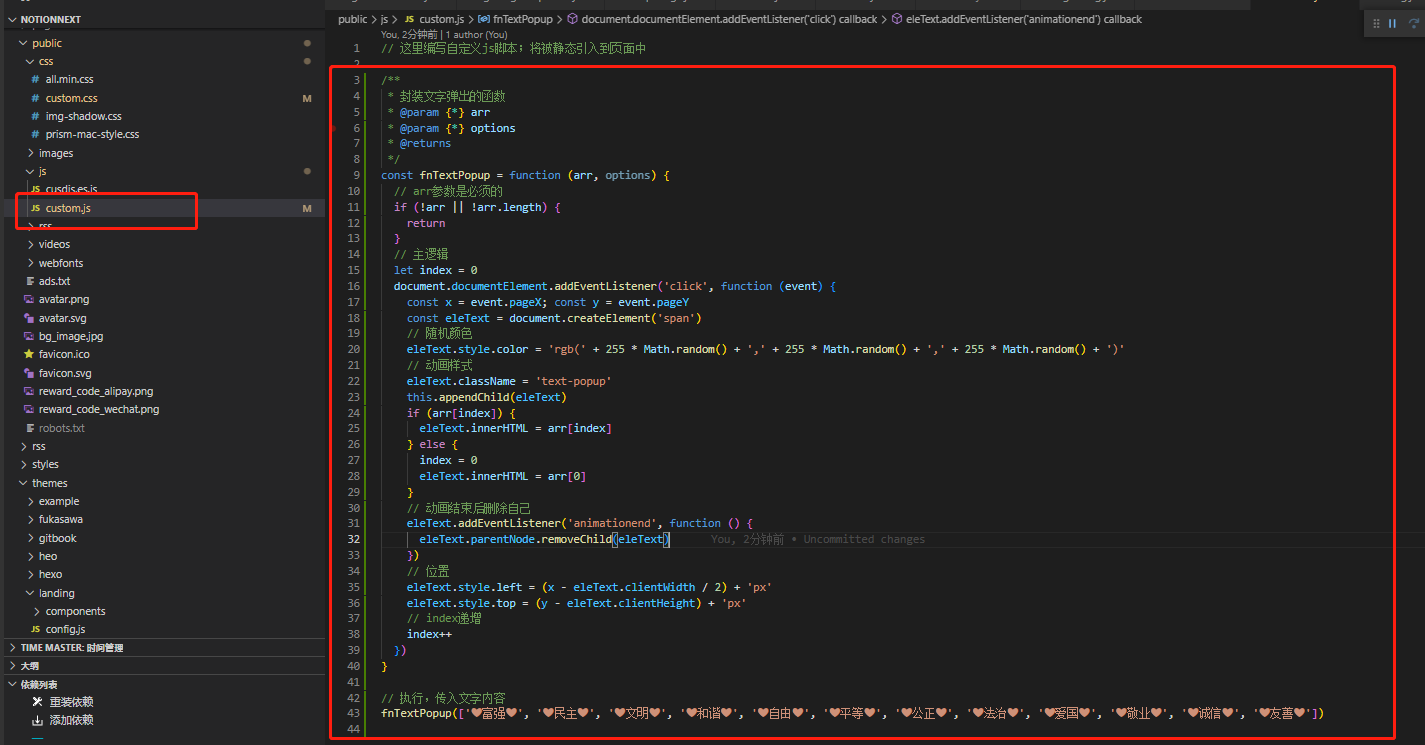
저장소에서 /public/js/custom.js를 찾습니다. 이곳에 사용자 정의 JS 스크립트를 작성할 수 있습니다. 파일 끝에 다음 내용을 추가합니다.
JavaScript
/**
 * Wrap the text popup function.
 * @param {*} arr
 * @param {*} options
 * @returns
 */
const fnTextPopup = function (arr, options) {
  // The arr parameter is required.
  if (!arr || !arr.length) {
    return
  }
  // Main logic
  let index = 0
  document.documentElement.addEventListener('click', function (event) {
    const x = event.pageX; const y = event.pageY
    const eleText = document.createElement('span')
    // Random color
    eleText.style.color = 'rgb(' + 255 * Math.random() + ',' + 255 * Math.random() + ',' + 255 * Math.random() + ')'
    // Animation style
    eleText.className = 'text-popup'
    this.appendChild(eleText)
    if (arr[index]) {
      eleText.innerHTML = arr[index]
    } else {
      index = 0
      eleText.innerHTML = arr[0]
    }
    // Remove itself after animation ends.
    eleText.addEventListener('animationend', function () {
      eleText.parentNode.removeChild(eleText)
    })
    // Position
    eleText.style.left = (x - eleText.clientWidth / 2) + 'px'
    eleText.style.top = (y - eleText.clientHeight) + 'px'
    // Increment index
    index++
  })
}

// Run with popup text content.
fnTextPopup(['❤번영❤', '❤민주❤', '❤문명❤', '❤조화❤', '❤자유❤', '❤평등❤', '❤공정❤', '❤법치❤', '❤애국❤', '❤헌신❤', '❤성실❤', '❤우호❤'])
예시는 다음과 같습니다.
2. 애니메이션 스타일
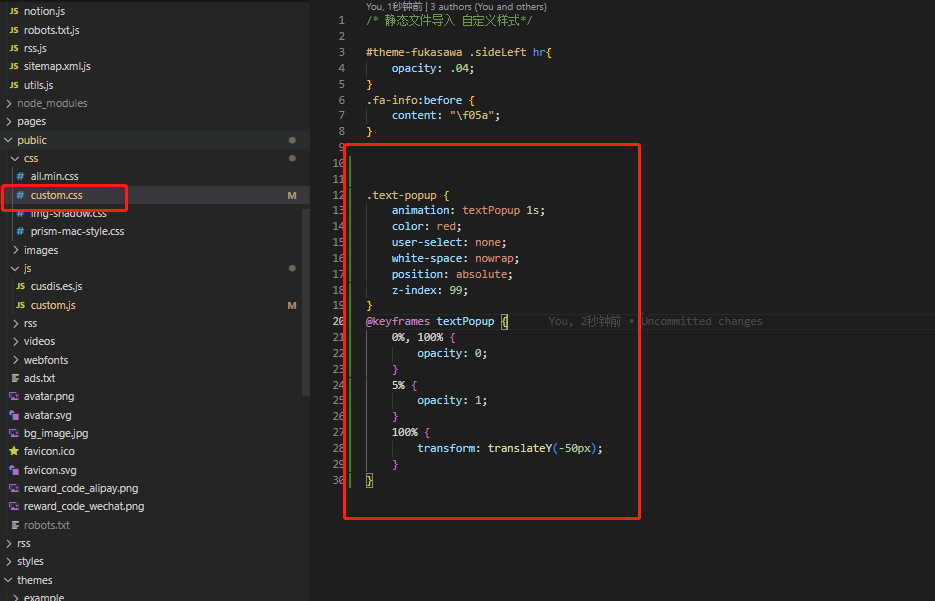
/public/css/custom.css에 다음 스타일을 추가합니다.
CSS
.text-popup {
    animation: textPopup 1s;
    color: red;
    user-select: none;
    white-space: nowrap;
    position: absolute;
    z-index: 99;
}
@keyframes textPopup {
    0%, 100% {
        opacity: 0;
    }
    5% {
        opacity: 1;
    }
    100% {
        transform: translateY(-50px);
    }
}
예시는 다음과 같습니다.
마무리
위 두 파일을 수정한 뒤 프로젝트를 다시 배포하면 작업이 완료됩니다.
원문 링크
https://docs.tangly1024.com/article/notion-next-click-effect